


Installation Guide
A complete guide to help you install and care for your Joinery by Bears vanity, from delivery to final setup.
Table of Contents
1. Unpacking & Inspection
Keep the vanity in its original packaging until installation day.
Carefully unpack the vanity, stone benchtop, and basin.
Inspect for any damage or missing parts immediately.
Report any issues within 48 hours to support@joinerybybears.com with clear photos and your order number.

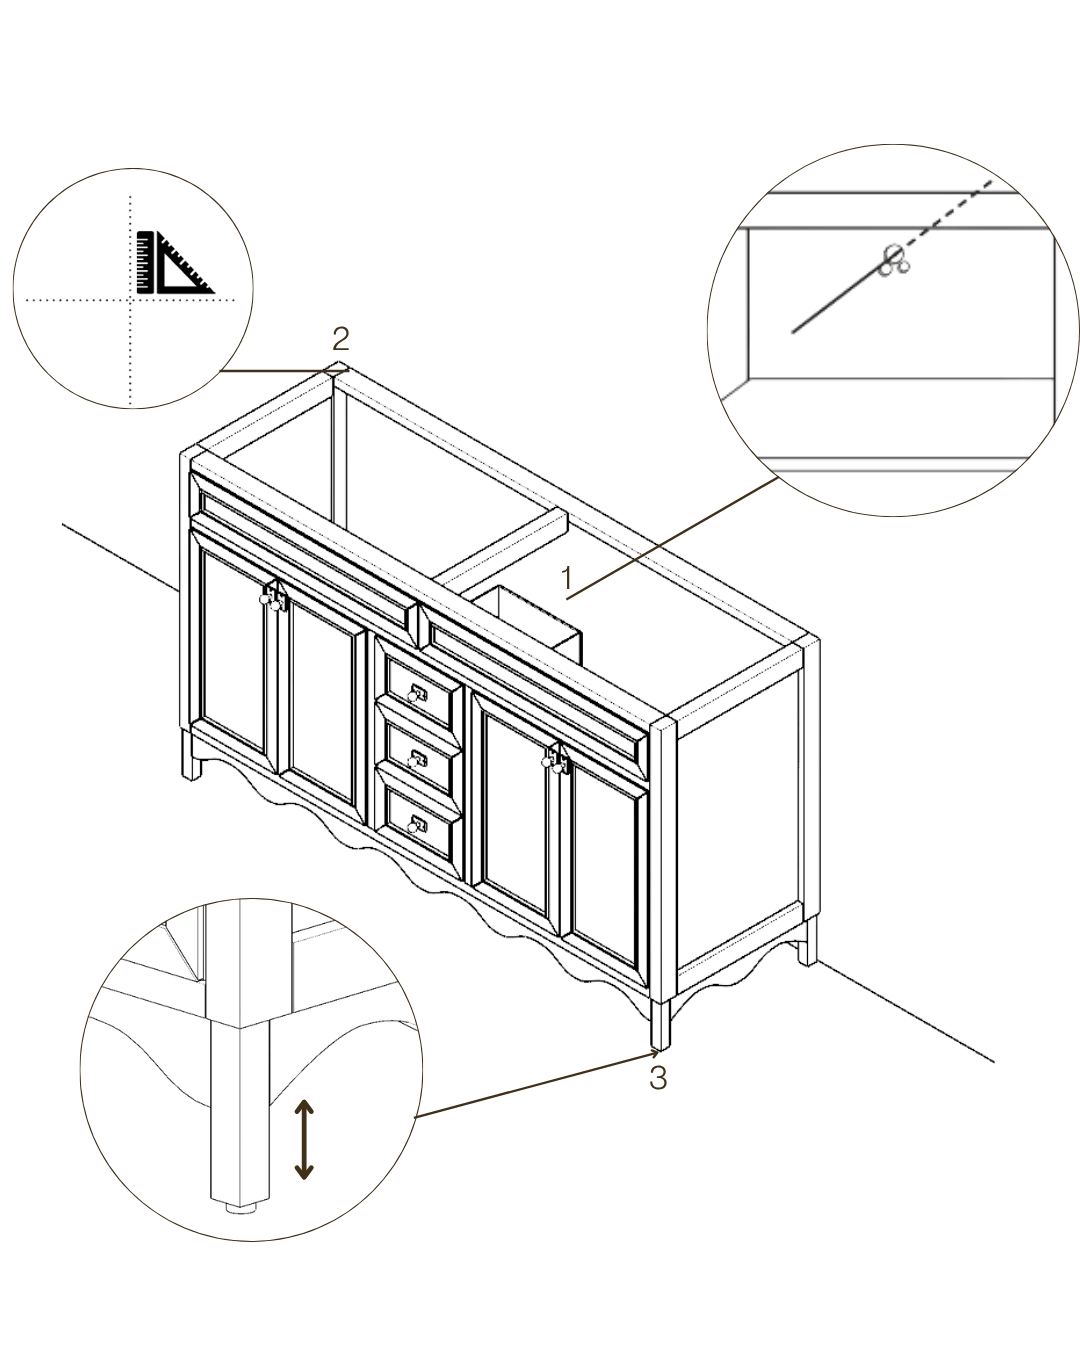
2.1 Freestanding Vanity Installation
Follow these key steps for your freestanding vanity:
Position the vanity, aligning with your plumbing access points.
Use a level to check for alignment.
Adjustment Tip:
Our freestanding vanities are equipped with adjustable plastic feet underneath.
If your floor is not perfectly level, you can adjust the vanity height by carefully rotating these feet to stabilise the cabinet and ensure a flush, even finish.If additional adjustment is needed, use shims (wood or plastic) and trim if necessary.
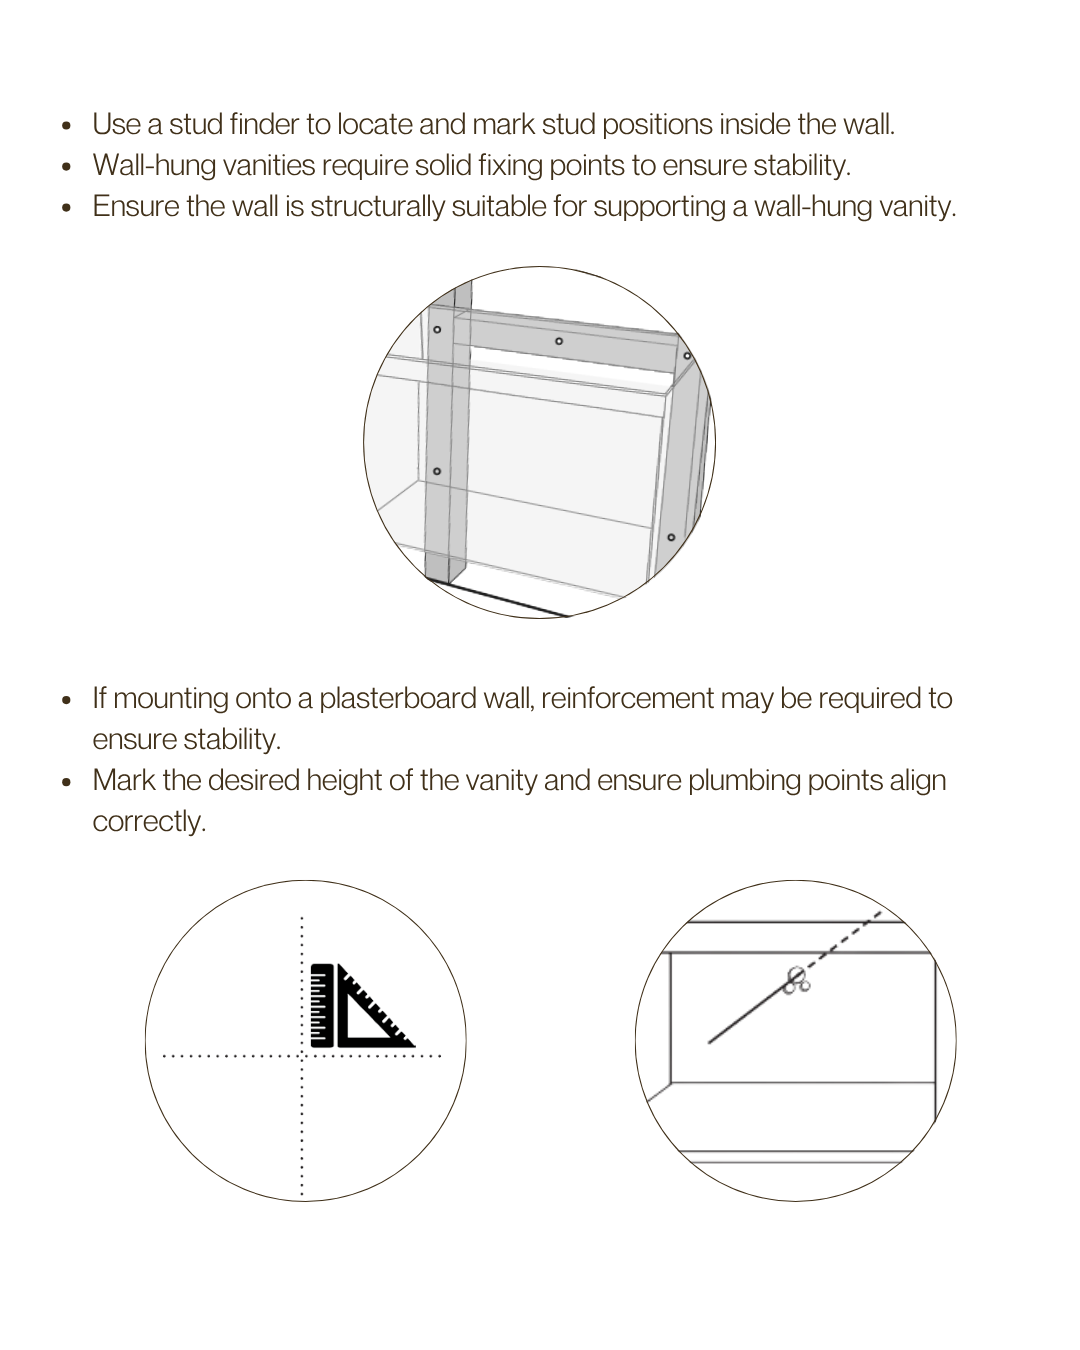
2.2 Wall-Hung Vanity Installation
Installing a wall-hung vanity requires extra care:
Locate wall studs using a stud finder — reinforcement may be required.
Mark height and plumbing points accurately.
Drill pilot holes at stud locations and fix the vanity securely.
⚠️ Note: Wall-hung vanities must be fixed to structural studs for safety.
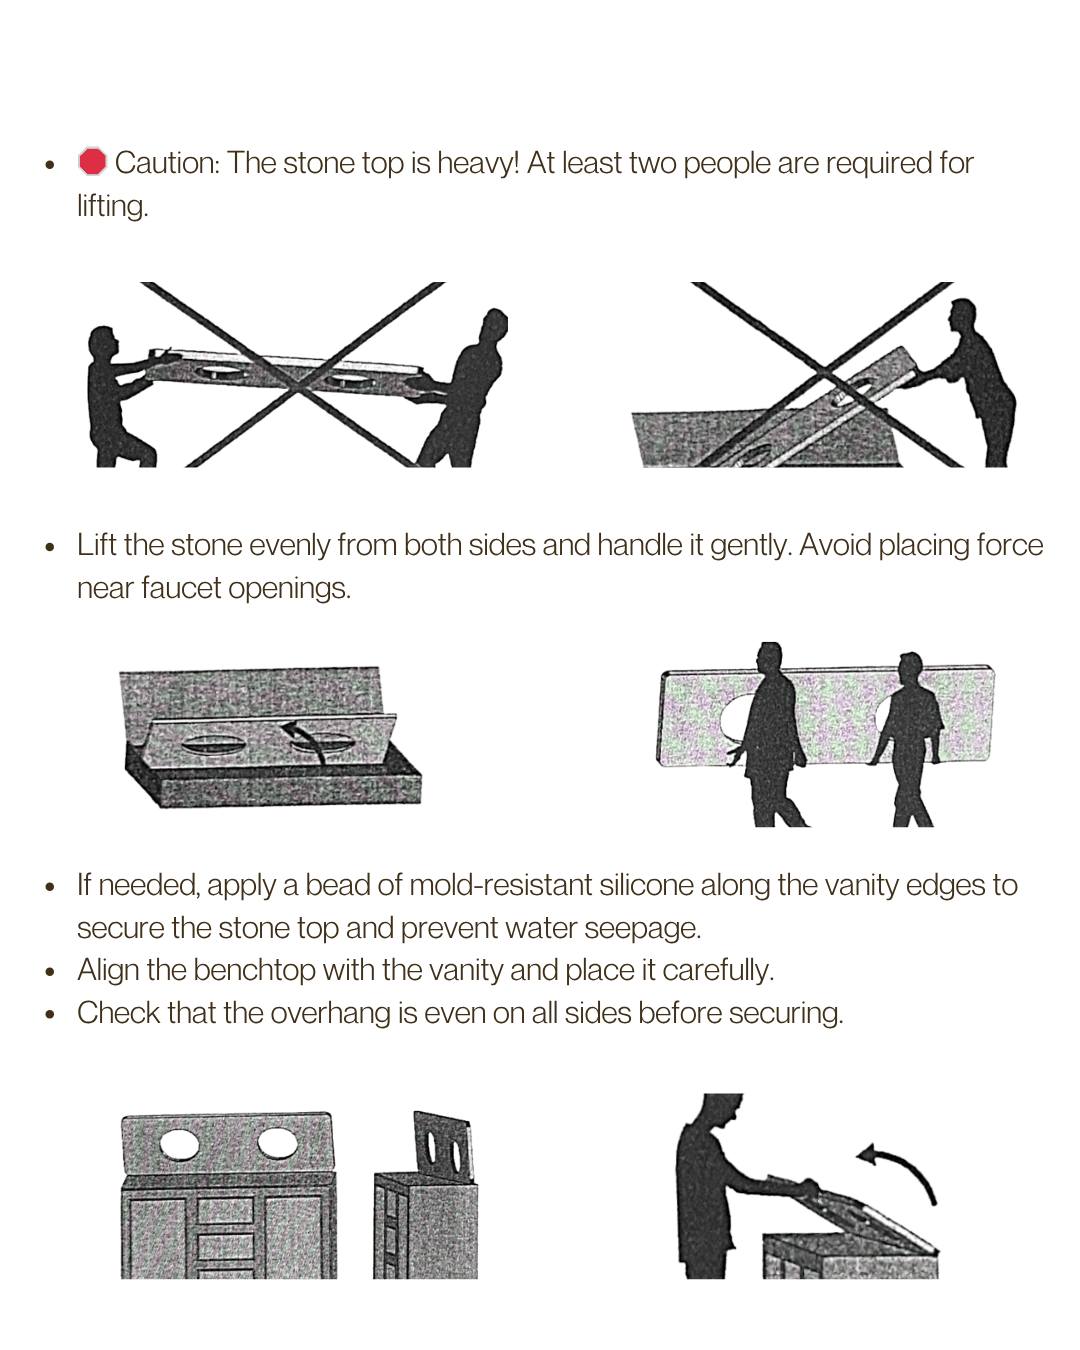
3. Handling Your Stone Benchtop
- Apply mold-resistant silicone along the vanity edges to secure the stone top.
Carefully lift and install the stone top — it requires at least two people.
Stone tops are heavy — always lift with two people.
Never lift from the sink cutout or tap hole area.
Ensure even placement with slight overhang on all sides before securing.
Connect plumbing fixtures via a licensed plumber.
Install handles using a screwdriver (handles are packed inside).
4. Installing the Splashback (If Applicable)
Position the splashback carefully above the stone top.
Use a neutral-cure silicone to secure it to the wall.
Press gently and evenly across the surface to ensure full adhesion.
- If you choose not to install the splashback immediately, ensure the wall is properly finished or sealed to prevent water damage.
- 🎥 Watch How It’s Done:
Watch Video Tutorial

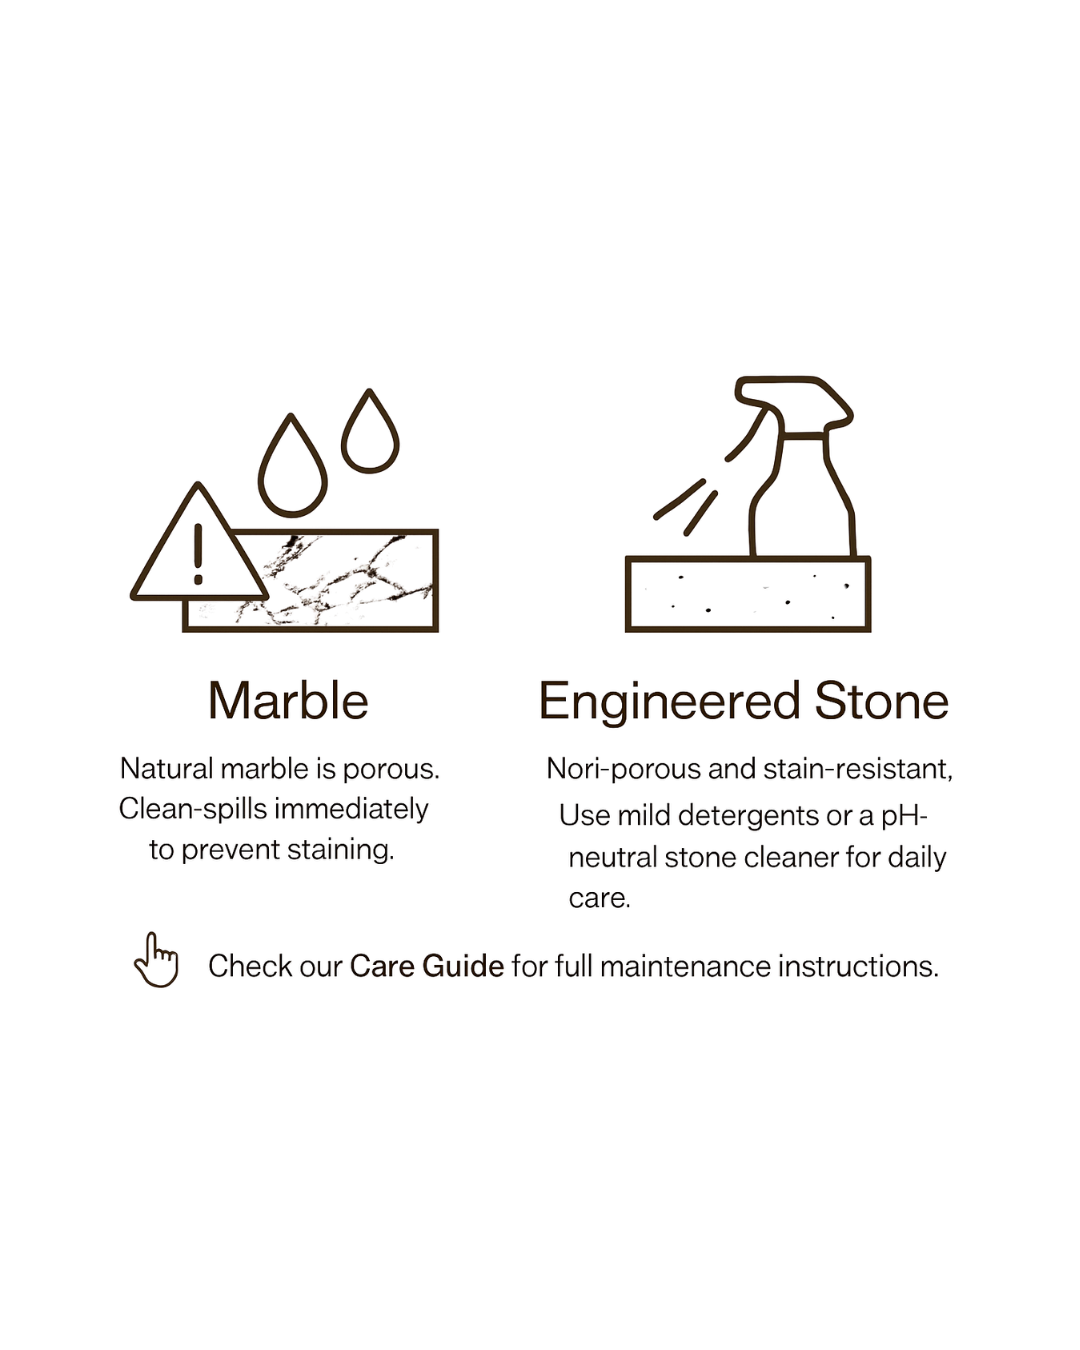
5. Marble and Engineered Stone Care
Marble:
Natural marble is porous. Clean spills immediately to prevent staining.
Use pH-neutral cleaners only — avoid acidic or abrasive substances.
Engineered Stone:
Non-porous and stain-resistant.
Use mild detergents or a pH-neutral stone cleaner for daily care.
6. Sealing Recommendations
Marble tops are not pre-sealed.
We recommend sealing marble tops after installation with a professional-grade stone sealer.
Re-seal every 6–12 months for optimal protection.
Engineered stone does not require sealing.
💡 Tip: A neutral-cure silicone seal around edges prevents water seepage.

7. Final Adjustments & Cleaning
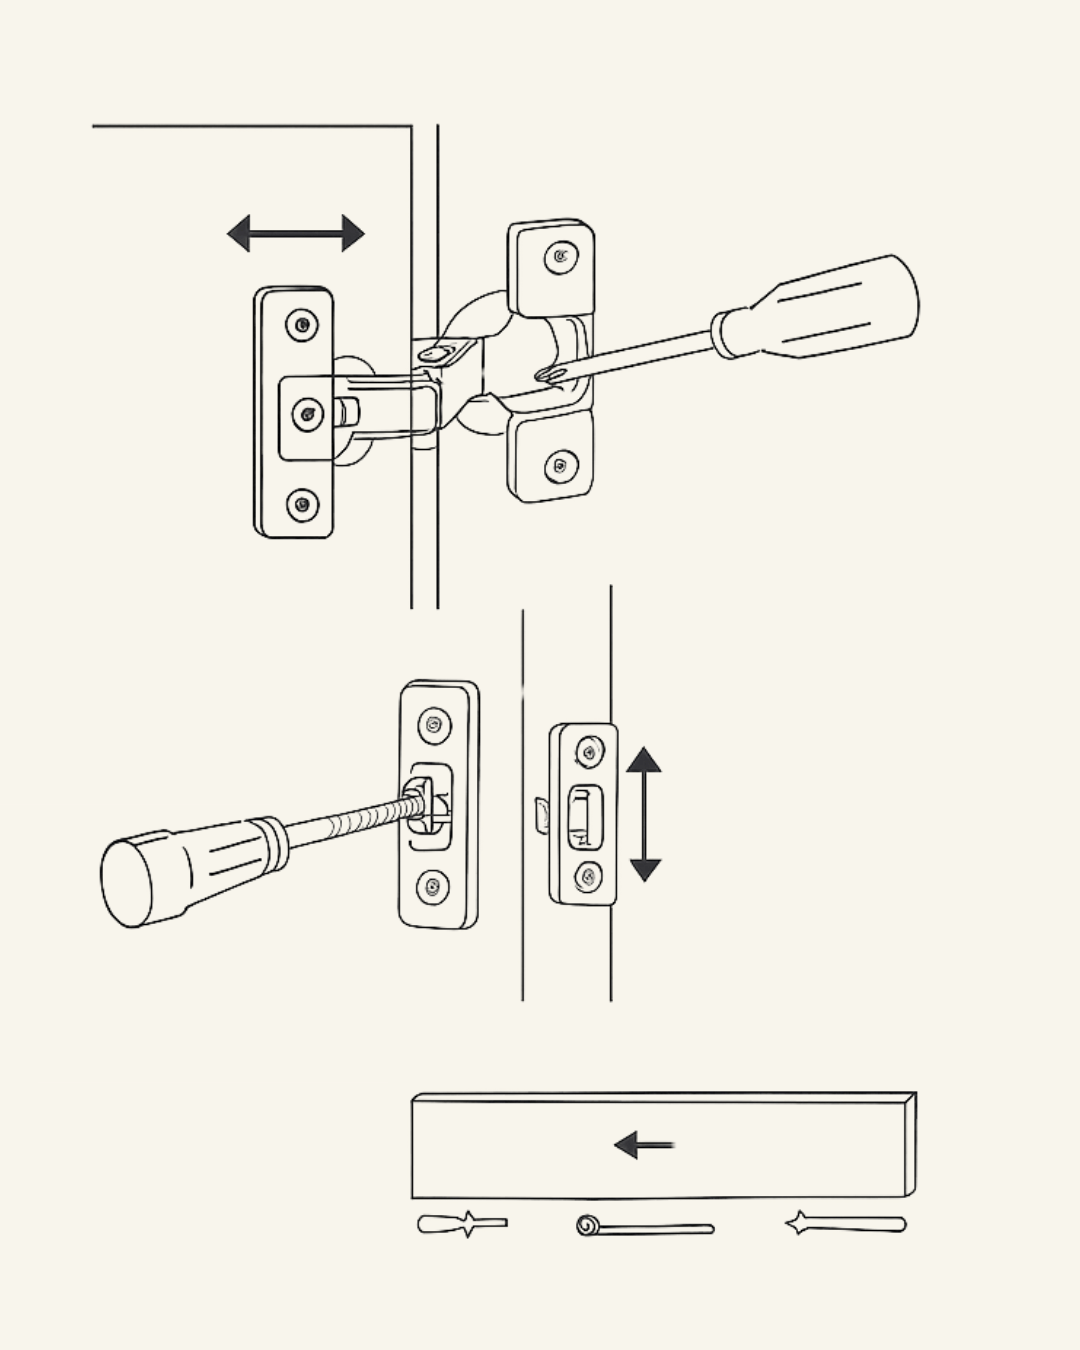
Our vanities are fitted with Blum soft-close hinges and runners.
Sometimes during transport, cabinet doors or drawers may shift slightly and appear not perfectly level — this is completely normal.
Blum hinges are designed with three-way adjustment for easy alignment:
Side-to-Side Adjustment (Horizontal Gaps)
Use the front screw on the hinge arm to move the door left or right.
Height Adjustment (Up/Down)
Slightly loosen the hinge mounting plate screws to adjust the door height.
Depth Adjustment (In/Out)
Adjust the rear screw to bring the door closer or farther from the cabinet frame.
🛠 Only a standard Phillips screwdriver is needed — no special tools required.
With a few simple adjustments, you can achieve a perfectly level and seamless look.
💡 If you’d like a visual guide, you can refer to Blum’s official adjustment video:
🎥 Watch Blum Hinge Adjustment Tutorial
8. Caring for Your Vanity After Installation
Congratulations on completing your installation!
To maintain the beauty and longevity of your new vanity, here are a few professional care tips:
Allow Time to Settle:
After installation, avoid heavy use for the first 24–48 hours to allow all silicone seals to properly cure and secure.Protect the Finish:
Our vanities are finished with high-quality 2PAC paint or timber veneer with a protective varnish.
Avoid using harsh or abrasive cleaners — instead, clean with a soft cloth and a pH-neutral, non-abrasive cleaner.Handle Moisture Carefully:
While moisture-resistant, vanities are not waterproof. Always wipe away standing water or spills quickly to prevent swelling or damage, especially around seams, drawers, and doors.Routine Maintenance:
For timber vanities with a varnished finish, consider applying a suitable wood polish every 6–12 months to maintain shine and hydration.Ventilation Matters:
Ensure your bathroom has good ventilation to prevent moisture buildup — this helps protect both the paint and the stone surfaces over time.Avoid Dragging or Hanging Heavy Items:
Never hang heavy items like towels or sit on the vanity — even strong materials can stress under uneven loads over time.